
Editing in Lightroom Mobile | Salt Lake City Family + Senior Photographer

 My favorite ways to edit my cell phone pictures is through the Lightroom Mobile App. It can be a little intimidating if you don't know what you're doing, so I thought I'd show you a quick, basic edit on some photos I took. Before we jump into the app, we need to get to the basics of editing; exposure, highlights, shadows, contrast and white balance.
- Exposure: basically how light or dark an image is. If it's properly exposed, it won't be too dark or too light.
- Highlights: These are the brightest parts of your image. Usually the sky or something white. If your highlights are too "hot" (aka too bright) it'll just be white. This is called being, "blown out."
- Shadows: the opposite of highlights, these are your dark spaces.
- Contrast: what gives your image depth and pop.
- White Balance: The overall color cast of your image. Shooting in shade automatically results in a blue cast, while shooting on grass will cast green on your image.
Now that we've got that out of the way, a good image has your darkest dark and your lightest light. That means you want a good range of depth from dark to light and all the colors in-between. Failure to do this results in "flat" images.
Using Lightroom Mobile
You'll first need to download the app from the app store or google play or whatever place you get your apps. In order to use the app you'll need to log in with your adobe account. Don't worry if you don't have one, you can make one really fast and it's free! Once in the app you'll see an option to import photos. I screen recorded myself importing a handful of pictures that you can watch in the video below. It gives you an option to import from your camera roll. Once imported you can click on an image and begin to edit. I always like to start with exposure first and then make my way through highlights (usually bringing them down to have more detail), deepening my shadows and blacks and adding just a bit of contrast. It's also important to check your white balance and "warm" them up if your image is in the shade like mine were. Since I imported a few photos where the staging is the same and the light didn't change, I was able to "copy settings" so that I can paste exactly what I just did onto the next image. This helps with cohesion.


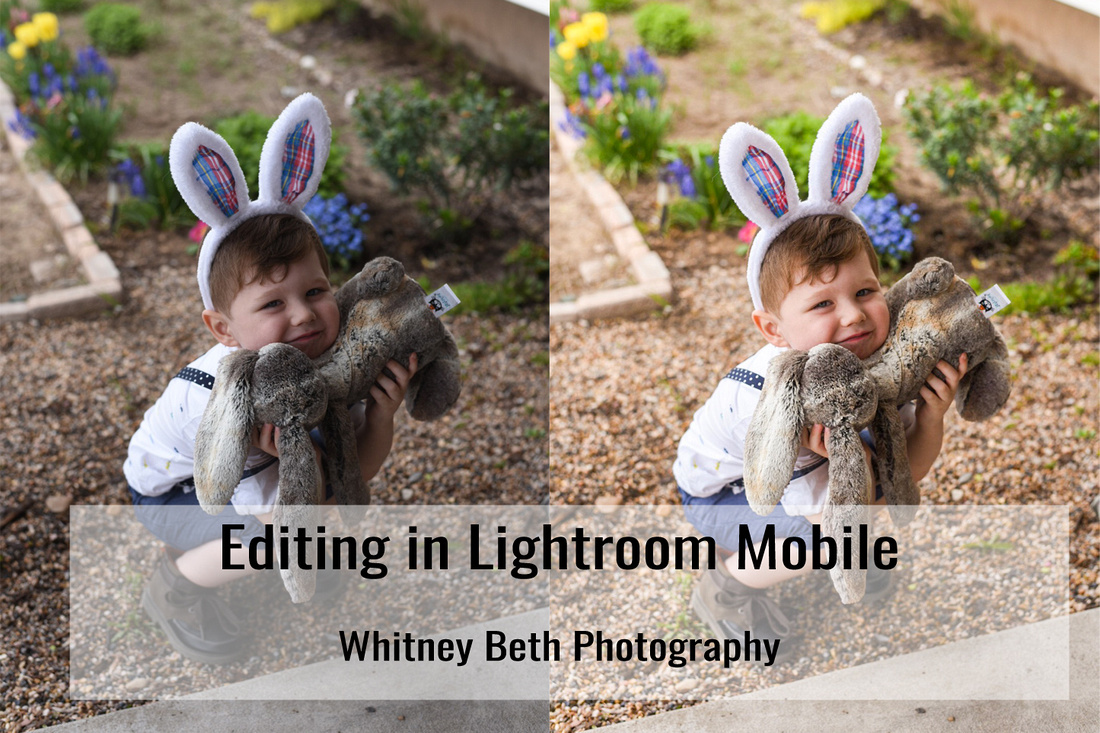
Here's a little before and after action for you. Before is on the left, after is on the right.
In the above video you can see that I added a bit of vibrance - this makes the colors in my spring flowers really pop!


To show you a different lighting scene I also imported this picture of Jonesy and the dogs during their Easter Hangover the next day. The below clip also shows you how to export to your camera roll so you can share it online!

 Lightroom is so easy to use once you get the hang of it! I love how I am able to have more control over my edits and utilize my photo knowledge. This is just the tip of the iceberg, so feel free to play around with it and let me know how you like it!