My Front Door Makeover | Whitney Beth Photography
My Front Door Makeover | Whitney Beth Photography
Remember at the start of the pandemic when myself and a few other photographers started doing front porch sessions as a way to still work when everything was shut down? I never took my own front porch picture for the only reason of I didn't like my front porch. Yep. Super vain and a lame excuse, but that's why. We have lived in this house for five years now, FIVE! When that number sank in I took on this whole new mantra in regards to my home. I wanted to love every part of it, not just be "ok" with it. So I've started renovating and improving small spaces in my house (because let's be honest, a small space is all a work from home mom can handle at the moment.) I have all these plans drawn up for my house in my sketch book, already mapped and planned out. I decided to start with the front door - since I should probably take advantage of nice weather while we have it if I'm going to have my door wide open all day. My problems all stemmed from the broken, ugly, storm doors. I don't like storm doors to begin with, but this one was a real piece of work. It was broken on the main entry side, super heavy, super dirty and constantly was blowing open and shut in the wind, causing a chunk of our vinyl siding on the roof of the porch to crack open. When I start projects it's usually due to the "I can't take it anymore!" mentality and I snap. Or in this case, remove the storm doors from the hinges.


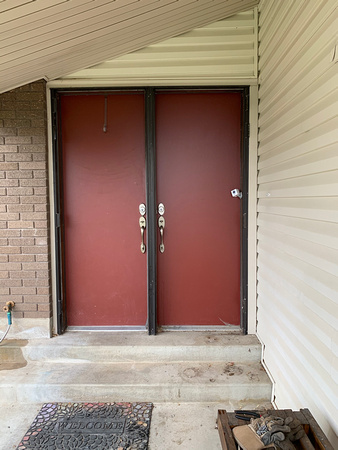
Here's the "before" of the whole project. Not the corner of the storm door digging in and resting inside they vinyl. While the kids played with chalk, I unscrewed all 700 screws keeping that door in place.


It already looked SO much better! In fact it stayed that way for a month before I had all the supplies, energy and time I needed to start the next phase. I drew up a mock up of what I wanted the doors to look like. These doors are junk and flat and bleh. (Not to mention two smaller than normal doors that don't actually open up into a true double door thanks to the dumb bar in the middle, but whatever.) But new doors are expensive, so I was just going to have to make due with what I had. Instead, I decided to add some box moulding to the front to give it a little depth. I ended up needing 5 - 96" pieces of trim which cost me about $30. I measured and got to work cutting my pieces down to size with my compounding miter saw.


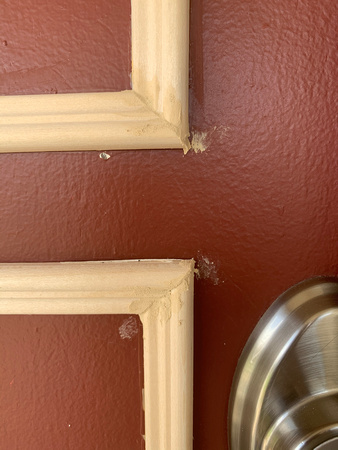
I got them all cut down, and did a dry fit. This took FOREVER. It's not as simple as measuring down 4" and over 3" or whatever. Since these doors are most likely original to the 70's when my house was built they came with their own perks. The most frustrating was they weren't exactly even and level. So I had to tape and retape my trim pieces, stand back and check it out. It took so long. Once I was happy with it, I used wood glue and glued all the trim to the door. Then I taped them up to hold them in place. Once they were set, I filled in all the mitered corners with wood filler (as well as holes in the door) sanded it down and caulked all the seams. (In between everything I got a new door mat and spray painted some of my pots black to make them look cohesive.)


Once everything was sanded and caulked it was time for the most satisfying part - paint! I used Ripe Olive by Sherwin Williams and mixed it with BB Frosh powder I bought from my friend, Kenna who is a DIYer/handy woman. I had some mishap with my polyurethane and ended up having to repaint and reseal it. But now it's done and I love it! I can't believe it took me five years! Had I done it sooner, I might not have had to have my braces in the picture! haha! In total I spent about $30 on trim, I already had wood filler, caulk and spray polyurethane, $12 on paint (which I still have SO much of) and I used half of the $14 BB Frosh. Not bad for a total door makeover for $56!


