The Editing Style of Whitney Beth Photography | Utah Family + Senior Photographer
Every photographer is different. One of my favorite things when I was back in school was seeing how my classmates and I would photograph the same model in the same set and still get drastically different pictures. Composition and flow of the shoot is part one of what defines our style, editing is part two. If you've read past posts about my very first paid gigs, as well as what I love to photograph, you really get a feel for how I have evolved as a photographer. It can take awhile for a photographer to be consistent and for some like me, years of tweaking of trial and error. I can confidently say now that I know my style, and I love it! In the photo world, we have categories that we lump ourselves in when describing our style. For example, dark and moody, light and airy, true to color, etc. Even though we are all so different, it does help us distinguish each other's work. I fall into the true to color area.
My love of documenting life and all it's moments impacts my editing style greatly. I want my images to look like what it did the day we shot. My main source of judging is white balance and skin tone - very similar to each other. Essentially, I judge the coloring of your image based off of your face. Ha.


Take this before and after a Makayla. in the left, she looks blue with a touch of purple (thanks to her jumper.) The very first thing I did was to "warm up" the image. When I say warm up, I am talking about the temperature slider. Did you know that your white balance is dependent on the temperature in which you took the image? Crazy right? Since we are in the shade, and shade is cooler than sunlight, boom - blue image.

 This is what my screen looks like when I'm editing in Lightroom. They menu on the right is what I use to control how the image looks. Because I backlit the image. (Sun is behind her) I underexpose slightly so that I don't blow out my highlights. (The white areas aren't overexposed - losing photo information.) From there I darken my shadows and blacks, add a touch of contrast, sharpen a bit and I am done! In the art world, a good rule of thumb that applies to photography is; a good piece of art always has a darkest dark and a lightest light. You want there to be a range of shades between the two extremes. This will help give some life to your art, rather than appearing flat and dull.


If you happened to catch my IGTV - I walk you through in real time how I edited this image of Austin and Jenna. It's a very similar process to Makayla's image. You can watch it --> here.


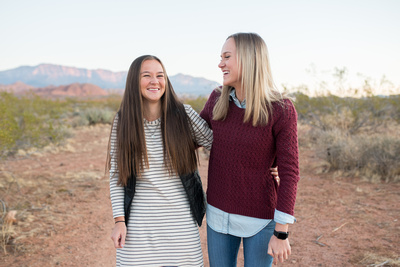
I try my hardest to get the image right in camera. This saves me sooo much time in front of the computer. And lets be honest, if I had to choose between editing and shooting, I'd choose shooting in a heartbeat. No contest. In this before and after of Paige and Brooke, I bump the exposure, warm it up just a smidge, (shade) bump the contrast, darken my darks and done. Easy peasy.
And that's it! - for the most part. If an image calls for it I'll do a bit more extensive work on it, but I like to keep things sweet and simple and as true to real life as it is. What do you think? Leave me a note below!
