Dinosaur Terrarium DIY | Salt Lake City Family + Senior Photographer


I've said it before, if I wasn't a photographer, I'd be a florist! I just love all things green and growing. I 100% blame it on growing up in Oregon. Moving to Utah in the middle of summer made me realize just how happy plants and flowers make me! One of the (many) things on my "before baby" list was to make little man a dinosaur terrarium. I made one for Jones before he was born and it is still in his room three years later! I really love dinosaurs and shamelessly provide my boys with all the dinosaur toys they could every play with. I was thrilled when Jones went through his dinosaur phase. (It ended up being the theme of his 2nd birthday.) So it was only fitting that this little dude get a terrarium as well. Not to mention - in the thralls of the newborn phase of life, succulents can stand to have a little neglect.
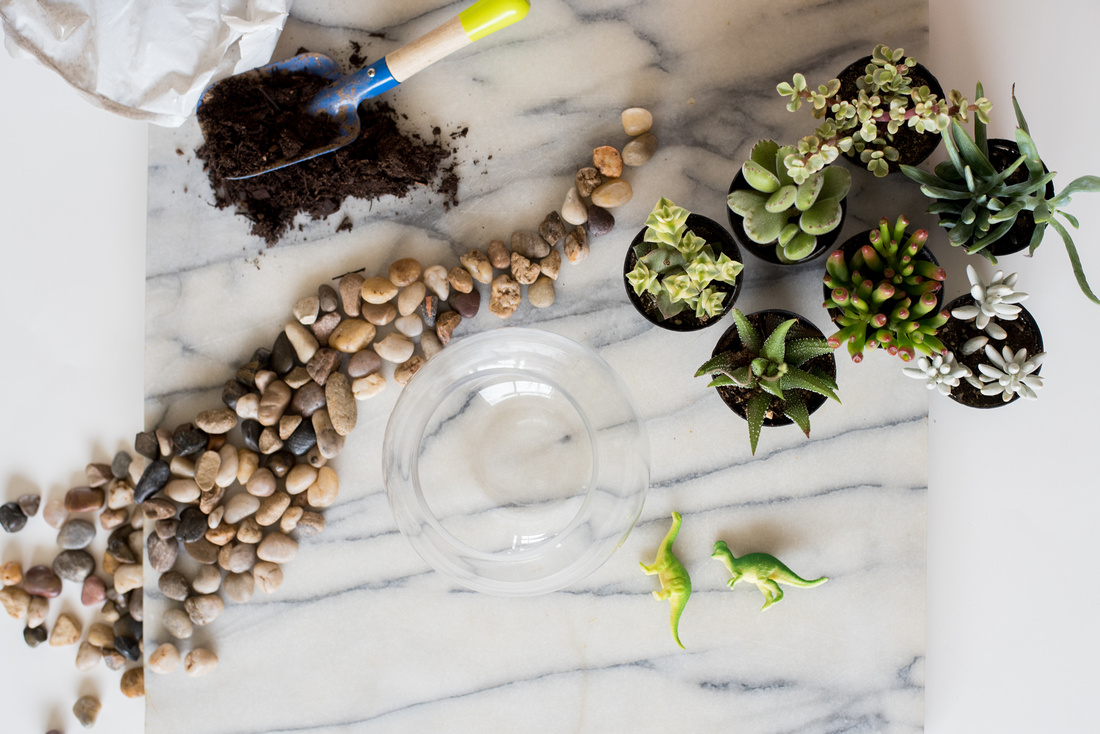
What You'll Need:
- Succulents - I got mine from Home Depot this time, but in the past I've also gotten mine from Ikea and Walmart
- Vessel - I love the look of glass and opted for a circular vase, but you can use anything. Terra-cotta pots work best for succulents since they wick away moisture and help keep the roots from rotting.
- Pebbles
- Potting Mix
- Dinosaur - or whatever you want to be the inhabitant of your terrarium

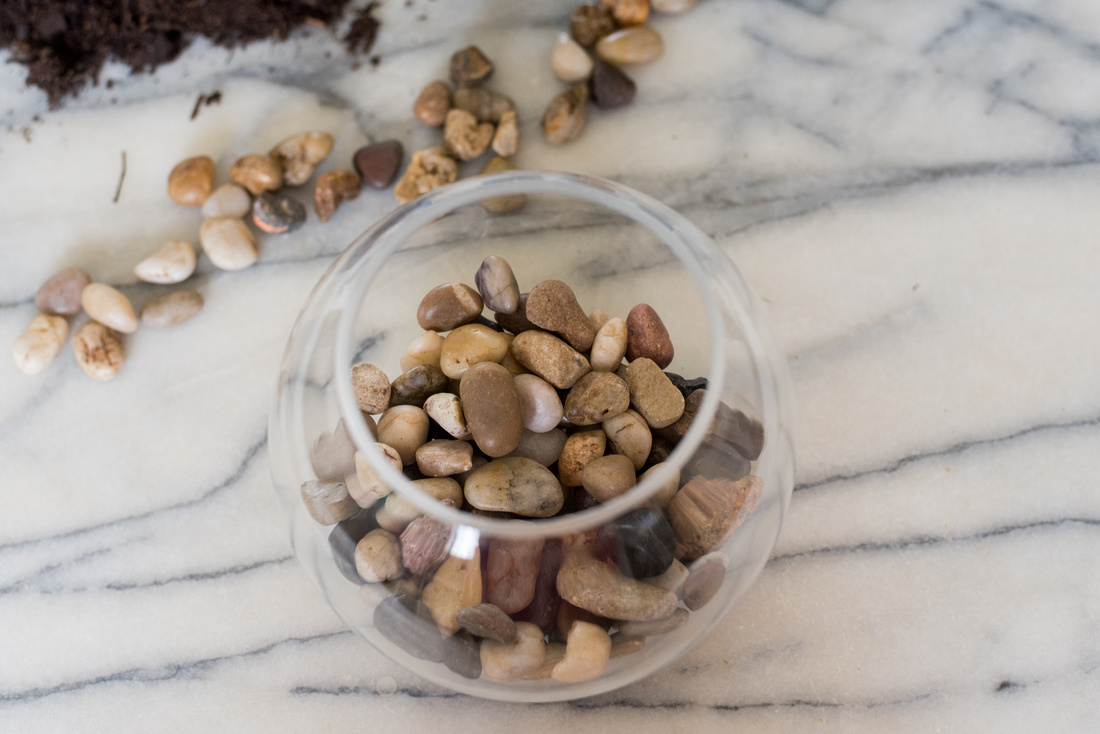
 1. First fill the bottom of your vessel with pebbles (if you're using terra-cotta, you can skip this step.) The purpose of the pebbles is to allow for drainage. Succulents don't like to be sitting in wet soil for long. They need someplace where the water can drain to and to save their roots from rotting. I like to fill my vase up about 1/4-1/3 of the way with pebbles just to be safe.


2. Take some potting soil (even better if it's made for cacti or succulents) and add enough to cover the layer of rocks. I like to do this so that I have a base layer. Plus it makes it easier when you're planting to not have to stick your hand through the narrow opening to fill in all the empty spaces.


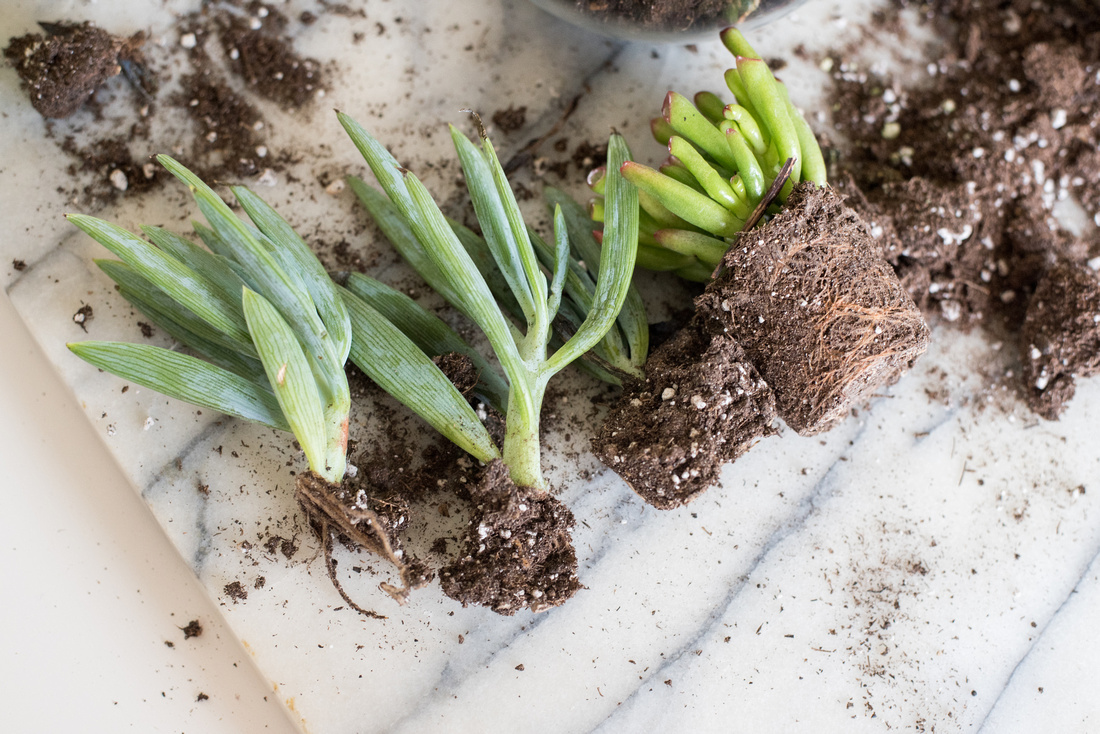
3. Take your succulents and remove them from their containers. I like to hunt and look for ones that have multiple plants growing in one container. That way I can have variety in size as well as separate them to divide up amongst the space.


 The above image is what it looks like when dividing the succulents. Carefully pull apart the dirt from the roots and the plants should naturally separate.
4. The next step is the fun but difficult one; planting! I say difficult because you have a narrow opening to work with. Luckily I have narrow hands! I like to try and keep my tall ones in the "back." (As far as a system goes, either start from front to back or back to front. It's way easier to have some sort of system than just trying to cram them all in a little pot.) This is where that base layer of soil comes in handy. Once you've placed your succulent, I just secure it with the nearby soil and gently pack it in.


5. Continue planting until you run out of space or plants - or both! Once all my plants are in their new home I like to add pebbles in groupings along the edges to make sure no erosion will occur with it's first watering.

 6. Now grab your dinosaur and find a good place for him, front and center!


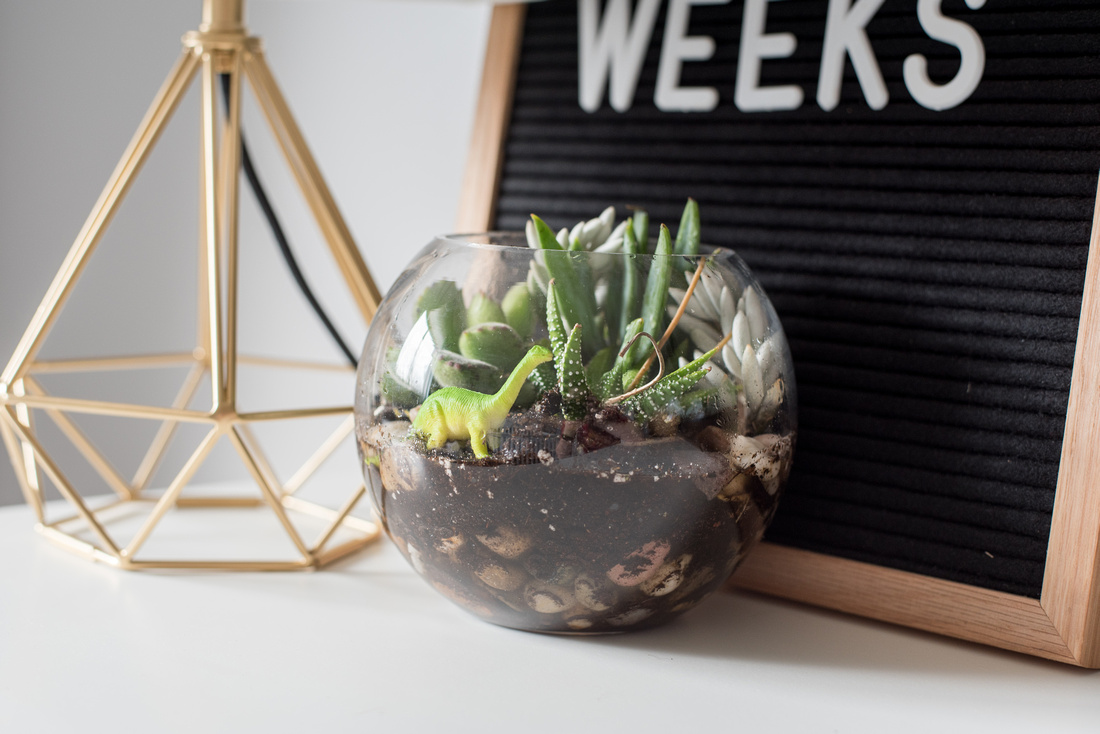
 Ta-Da! Once you've got everything in it's place, time to water. Don't water too much - remember how succulents don't want to go swimming?
Succulent Care Tips:
- Only water when soil is DRY
- Overwatering leads to root rot
- They love sun! Especially south facing windows that get sun all day
- If you have a purple or orange succulent - they need LOTS of sun and would probably do better just being planted outside.
- Green succulents are fantastic for indoor terrariums with less light than what they would get outside
- If you've overwatered, don't fret, just let them dry completely out before you water again - these suckers are hardy!
- If your succulent gets dry and cracky it means it's being under-watered. Just give it a drink and it should go back to normal
- If your succulent's leaves fall off just by brushing against it or gently touching it means you are over-watering it! Let that baby dry!
The Best part is seeing the finished product in the nursery! Let me know if this was helpful! Happy Planting!


