
Understanding Shutter Speed | Salt Lake City Family + Senior Photographer


Our next stop on our way to shooting in full manual mode is understanding shutter speed. Your shutter is what allows light in to your camera. (It's also what makes the "click" noise when you take a photo.) Light is what makes your pictures. Think of your shutter speed like a curtain - when you open and close it you're letting light inside. This is called exposing. The longer you leave your curtain open, the more light gets in. Now that you understand the function of the shutter, it's time to figure out your shutter speed. Shutter speed is simply the speed at which your shutter opens and closes. It's measured in fractions of seconds. To put it bluntly - the faster your subject the faster your shutter speed.
To help demonstrate different speeds, I enlisted the help of one of the fastest mammals I know - a toddler with a stick. Ha. I had Jones come with me to the side of the house where it was nice and shaded and I would be able to achieve all the shutter speeds I wanted to demonstrate. They aren't exact replicas of each pose because I had him just play around and "fight bad guys" - aka the trees. But by shooting something so fast paced I'm able to demonstrate the effects of different speeds.
 When you see a speed written like it is above (1/15 sec) that simply means that the shutter was open for one fifteenth of a second. As you can see, Jones is a total blur, while the other, stationary elements of the photo are clear.

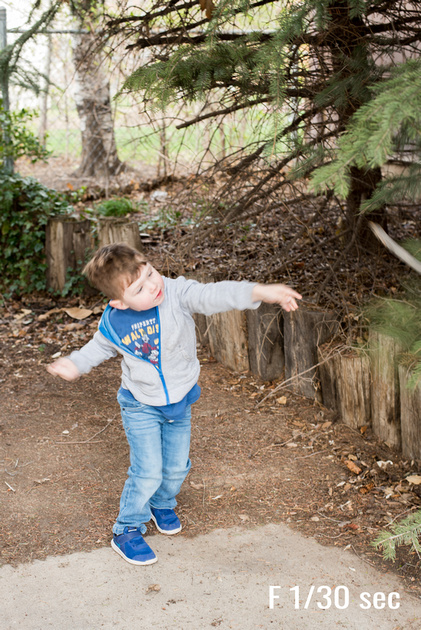
Next I demonstrated one thirtieth of a second. You can see in the two pictures that there is still quite a bit of motion blur, but depending on your subject, it is not impossible to get a sharp image - you just need to have a steady hand and subject!
 One fiftieth of a second. You can see Jones' face is pretty in focus - despite the background being a blur. I was using a process called, "Panning" (which I'll explain in full in an upcoming post) where you you move the camera with the subject. I recommend never hand holding the camera below 1/50. That means if you're going to shoot below one fiftieth of a second, use a tripod to avoid motion blur and camera shake.


F 1/250 - this shutter speed did a good job at freezing most of Jones. It's where I usually like to camp out when photographing kids. But since he is jumping and moving around so fast, there are still trace amounts of motion blur on his feet, hands and stick.
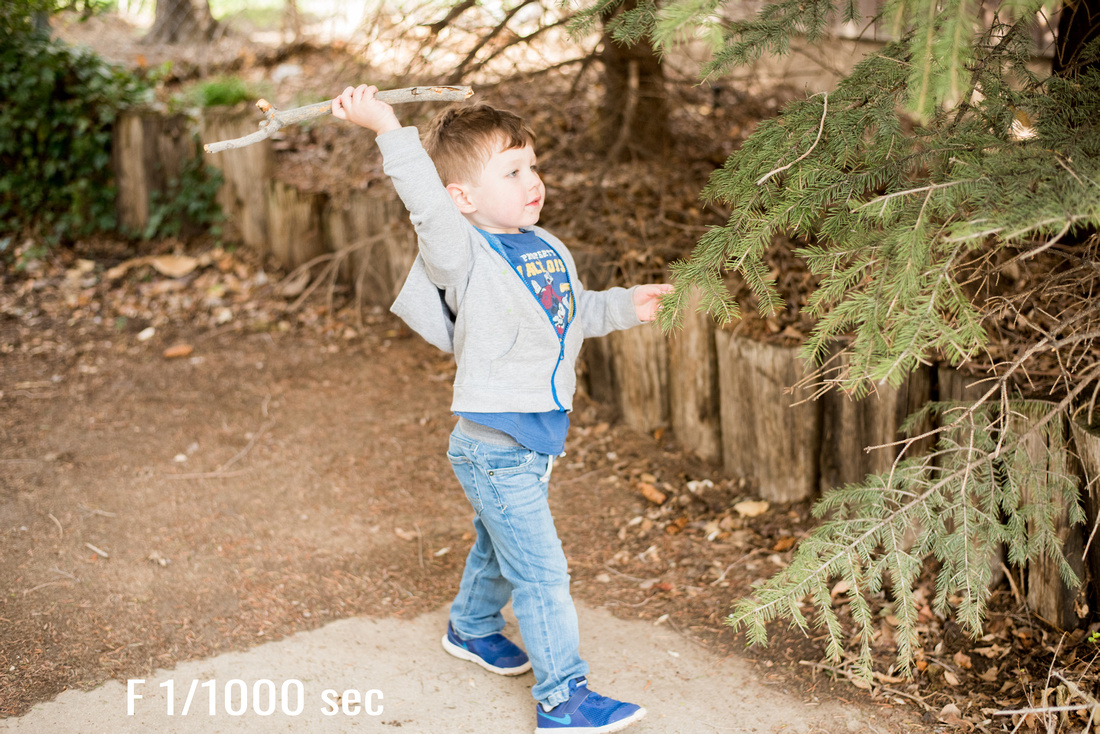 With F 1/1000 it looks as if Jones is posing for the pictures, when in actuality, he is mid swing and that poor pine tree limb is about to feel the pent up energy of a three year old going on no nap!
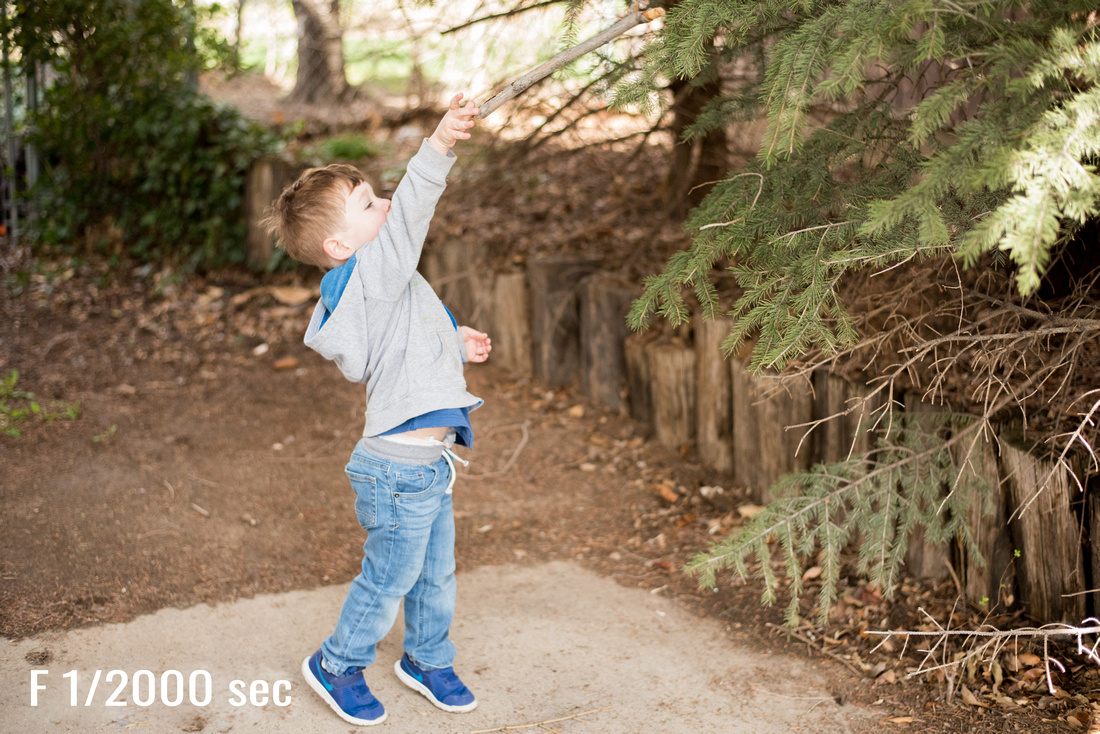 F 1/2000 shows the stick in mid air - because my shutter was moving fast enough you are able to see it clearly.


F 1/2500 Shows Jones in mid air and recovering from his jump. He is perfectly sharp in all the areas he should be. (Because I took these all within minutes of each other, I had to compensate my aperture to be able to achieve the shutter speed I wished - which is why some parts of the photo are "blurry" - this is due to my depth of field.)

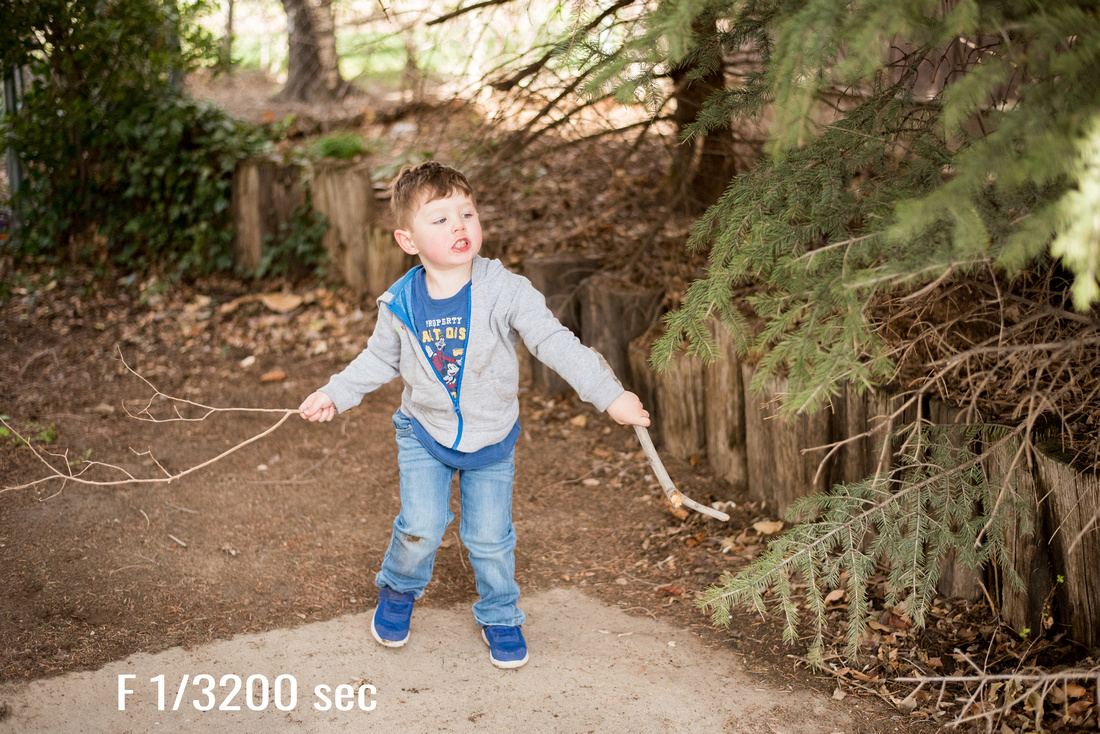 I ended on F 1/3200 - despite being able to go up to F 1/4000; not much would've changed and my subject decided he was done! In these pictures he's in full swing and running in circles. all in focus.
So now that we grasp the concept of the different speeds your shutter can utilize, when should you apply it? The more light you have, the faster your shutter can be. The less light you have, the slower your shutter needs to be to be properly exposed.
Lots of Light + Fast Subject = Fast shutter speed
Little Light + Slow Subject = Slow shutter speed
But what if you have a fast subject and little light? That is where shooting in manual is awesome are really pays out - by changing your aperture and ISO you can compensate for whatever you are lacking in. If that doesn't make sense, hold tight - my next "understanding" post is all about using your knowledge of Aperture, ISO and, Shutter Speed to shoot in manual!