
Easy DIY Photo Father's Day Tie | Whitney Beth Photography


Easy DIY Photo Father's Day Tie | Whitney Beth Photography
I was really on the ball this year with TWO father's day DIY gift ideas. (If you missed my last one about making something for the Dad who loves the pet he never wanted, you can read it here.) I decided to do something a little different for Danny from the boys, and since I already had a pack of iron on paper I brainstormed what we could do - which resulted in this very beautiful, one of a kind, photo tie.
You'll Need:
- Solid, light, colored tie (white is preferable)
- Iron on transfer paper
- lots of photos
- Iron/ironing board
- sharpies


The very first thing I did was go through my photos and pull out a few of each kid, one with them and Danny and a headshot of each dog. Then I plopped them into photoshop to roughly and quickly cut out the parts I wanted on the tie. (the photoshop part isn't necessary, but does save on ink!) Then I compiled them all onto a page and mirrored the document since when you print it'll be backwards and show up the right way.
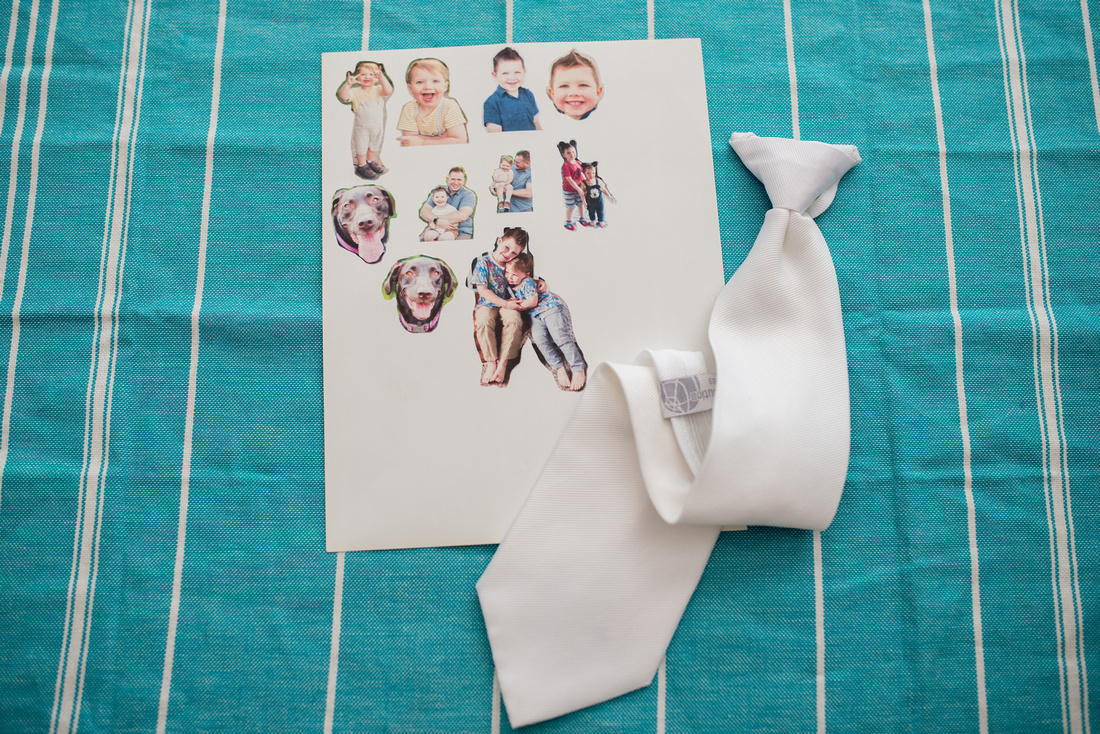 After you've printed out your pictures (you can see how they are a mirrored image of the document above) You'll want to cut out each picture and grab your tie. I lucked out and found a brand new tie at the DI (local thrift store) for $2! It has a zipper back, but whatever, ha! We're just making it that much easier for Danny to wear!

 Arrange your pictures how you want them on the tie with the photo side down. Then iron away! make sure to get the edges really good! I ended up ironing around 3 minutes total.

 Once the tie is completely cooled you can start peeling off the white backings of the iron on paper! (Easily the most satisfying part!)
 Depending on the amount and size of your pictures, your tie should look like this! You can stop here if you want, but I wanted the boys to be able to claim part of making it, so we grabbed the sharpies!


 With a little extra help for the two year old, my boys took turns drawing on the tie. I had them (or helped them) write their names on it and then I wrote the date. The rest was fun squiggly decorations.

In the end it looked like this! I'm loving how it turned out and that the boys did such a good job filling in the white space and staying away from the pictures! Danny doesn't do social media, and I'm pretty confident he doesn't read my blog (lol) so this tie is still 100% still a surprise! I can't wait to see his face when the boys give it to him!
Comments
|
January
February
March
April
May
June
July
August
September
(1)
October (1)
(1)
November (1)
(2)
December (2)
|
(2)
January (2)
(3)
February (3)
(3)
March (3)
(3)
April (3)
(3)
May (3)
(6)
June (6)
(4)
July (4)
(1)
August (1)
(3)
September (3)
(6)
October (6)
(2)
November (2)
(1)
December (1)
|
(3)
January (3)
(1)
February (1)
March
April
May
June
(1)
July (1)
(10)
August (10)
September
October
November
December
|
January
February
March
April
May
June
July
August
September
October
November
December
|
January
February
March
(1)
April (1)
May
(3)
June (3)
(2)
July (2)
(3)
August (3)
September
October
(6)
November (6)
(3)
December (3)
|
January
February
March
April
May
June
(4)
July (4)
(8)
August (8)
(12)
September (12)
(14)
October (14)
(13)
November (13)
(6)
December (6)
|
(14)
January (14)
(12)
February (12)
(13)
March (13)
(13)
April (13)
(13)
May (13)
(9)
June (9)
(11)
July (11)
(13)
August (13)
(13)
September (13)
(13)
October (13)
(13)
November (13)
(11)
December (11)
|
(13)
January (13)
(12)
February (12)
(10)
March (10)
(12)
April (12)
(12)
May (12)
(10)
June (10)
(11)
July (11)
(11)
August (11)
(12)
September (12)
(11)
October (11)
(10)
November (10)
(8)
December (8)
|
(7)
January (7)
(6)
February (6)
(14)
March (14)
(8)
April (8)
(13)
May (13)
(13)
June (13)
(9)
July (9)
(12)
August (12)
(12)
September (12)
(11)
October (11)
(11)
November (11)
(6)
December (6)
|
January
February
March
April
May
June
July
August
September
October
November
December
|
January
February
March
April
May
June
July
August
September
October
November
December
|
January
February
March
April
May
June
July
August
September
October
November
December
|
January
February
March
April
May
June
July
August
September
October
November
December
|