DIY Photo Valentines | Utah Family Photographer
Valentines is such a fun holiday! I love any reason to make things for those that I want to show my love for. As a kid I looked forward to Valentines day when all my classmates and I got to run around to each other's desks and drop off our Valentines into our homemade boxes. Not to mention I looooved making my own Valentines for family and close friends. There's something about having kids that makes holidays all the more special and fun. Getting to experience it through their eyes. I was perusing potential Valentine cards for Jones to pass out to his neighbor and church friends when I happened to remember a past Valentines day. I saw it online, I think one of my friends had made it for their kids and I thought it was the cutest, most clever card ever! So I set to work to making my own version of it this year. My little sister. Maddy (very enthusiastically) agreed that it was a cute card and was thrilled to be my helper with this project. AKA - she gets the goods at the end. Using my ghetto studio set up (you can read about it here) I picked out my most Valentine-y wrapping paper I had and set up shop in my front room - per usual.

 I ended up taping the edges to the wall and propping up the rest of the roll with my books & book end. (Classy, I know.) From there all it took was having Maddy come over after school, getting her "photo ready" - aka brushing her hair and spritzing a bit of dry shampoo on her part and having her stand in front of the backdrop with her fist extended.

 This was the shot we ended up going with. Straight outta the camera too. Because of the distance between her face and fist - I wasn't able to get both in focus. But don't worry! This was intentional! I wanted to play with perspective and by having her fist sharp I'll be able to achieve the 3D look I'm going for at the end. (If you really want you can have everything in focus, but you'll have to have some off camera flash to help you out.)

 Once my image was chosen I popped it into Lightroom and did a basic edit. (bumped exposure, add contrast, crop out the wall) Then there was nothing left to do but open it up in Photoshop to add the text!

 This is a screen shot of my set up for adding the text. I have this super cute font called, Bakery, that I used. I wanted the "Valentines Sucks!" to stand out against the busy background, so I copy and pasted the text layer, changed the font color to a pink, and then just moved it slightly. This easy effect causes the text to cast a "shadow" and help your eye know where to start. Then below it, on a straight line, I typed, "xoxo Maddy." I made the font smaller than the "Valentines Sucks!" and was able to keep it all white and on top of Maddy's shirt. The difference in font helps you to differentiate between the two.

 After I had everything the way I wanted, I saved it as a .jpeg and sent it to print! For Valentine sized cards I recommend printing them off in wallets, the ratio is the same as your camera shoots so you don't have to worry about edges being cut off. If you want to make a few bigger ones for extra special people, a 4x6 will do nicely! Anything bigger and you'll run into problems attaching your sucker.


Now comes the assembly! You'll need;
- Your freshly printed wallets
- Exacto knife
- Cutting board
- Suckers of your choice

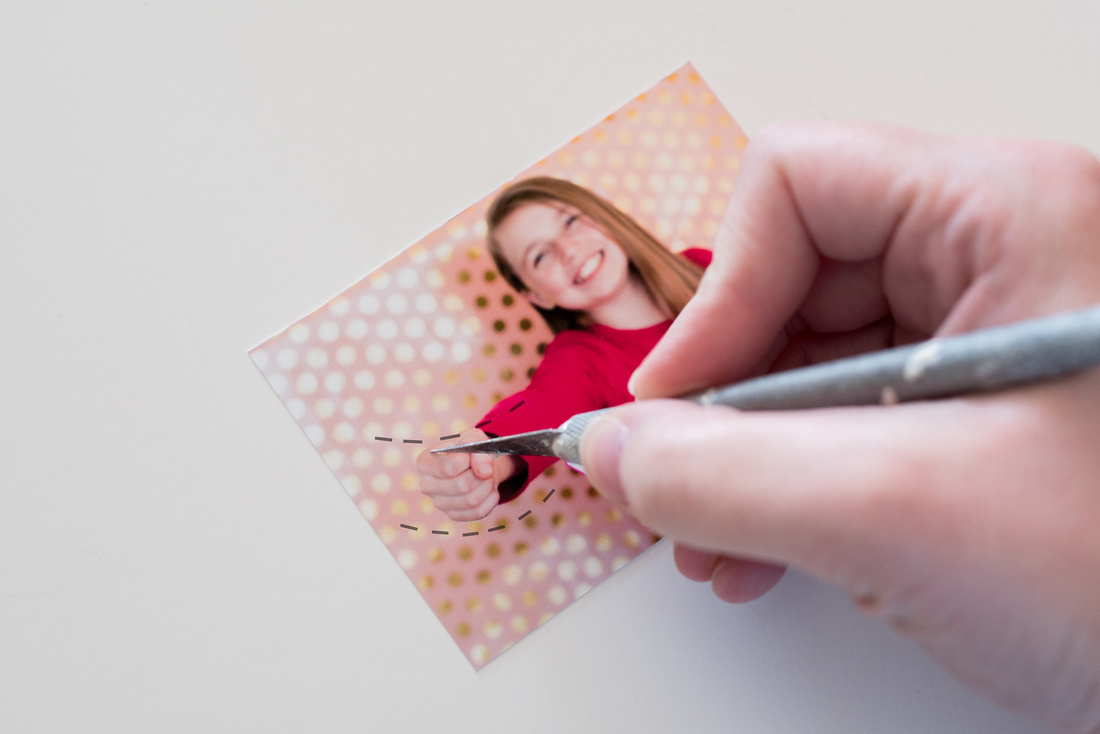
 Start by cutting two slits above and below the fist. make sure to extend the cuts past the fist - you'll need more slack than you think, and this will help prevent ripping.

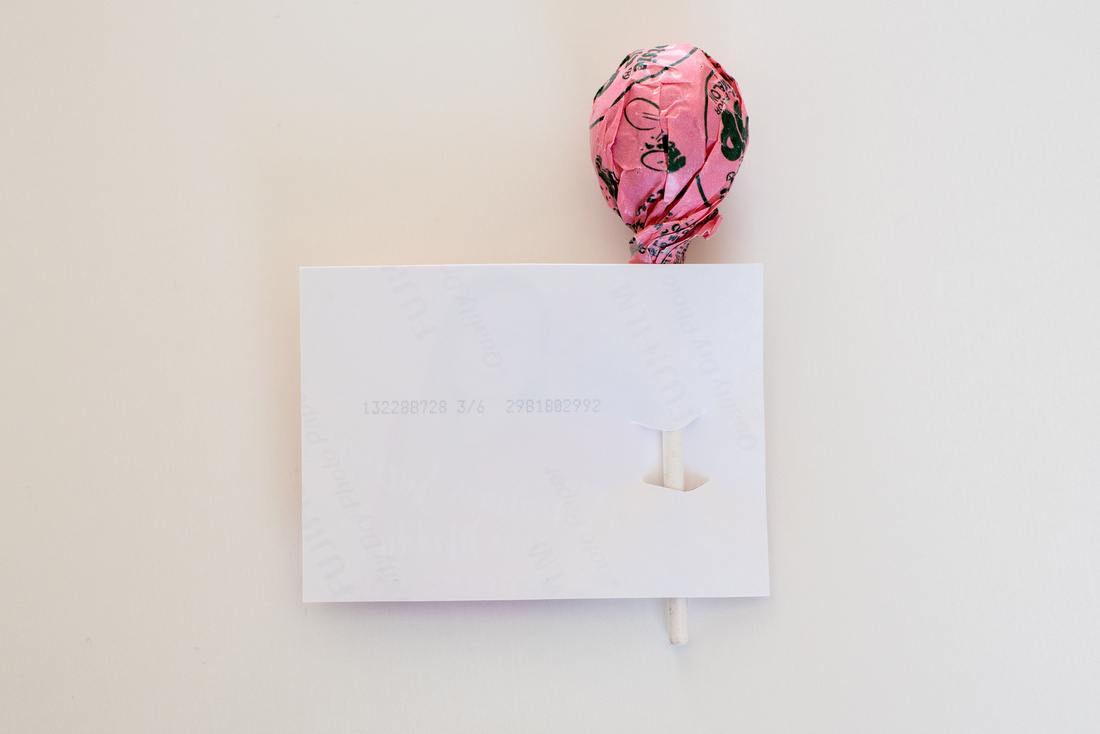
 Next, take your sucker stick and weave it in and out of the slits you just made. Be careful not to tear your picture! You can always make the slits longer if needed.

 It should look like this on the back. I cut my slits at a curve to match the angle and natural flow of Maddy's hand - but straight across will work too.

 And there you have it! Remember how I wanted to force the perspective to make it 3D? By focusing on Maddy's hand I'm able to achieve that look since it matches the focus of the sucker stick!

 Just do that about 20 more times and you've got enough for the whole class! Let me know if you try it! I'd love to see your take on this fun DIY photo Valentine!


